What is markup
Markup is the process of building a web page based on a design layout. The markup developer turns a graphic layout into code the browser understands, using two languages: HTML (structure) and CSS (appearance).
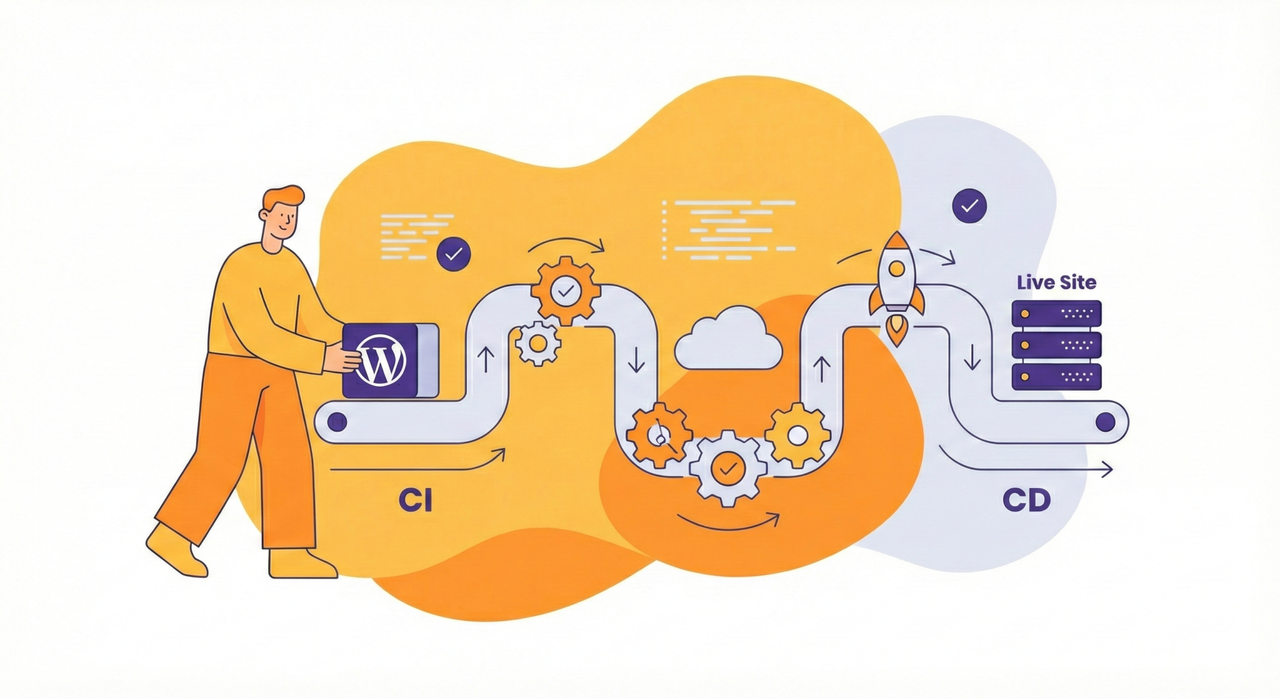
The overall site-building process
- Brief — the client describes what they need.
- Analysis — a technical specification is drafted, and the audience and niche are analyzed.
- Prototyping — a wireframe is created (the skeleton of the site made of black rectangles).
- Design — the designer draws each unique page as a full-fledged layout.
- Markup — the markup developer translates the layout into HTML + CSS.
- Backend development — the backend developer integrates the markup with server-side logic.
- Testing and launch.
Layout formats
It depends on the studio and the designer: previously it was PSD (Photoshop), then Sketch. Today the absolute industry standard is Figma (Adobe XD stopped development in 2023).
HTML basics
HTML (HyperText Markup Language) is a language for describing the structure of a web page. HTML describes the skeleton only, never the appearance.
<strong> does not mean “make it bold” — it means emphasizing text for search engines and screen readers.Types of tags
✅ Paired tags
They have an opening and a closing part. Between them is the content.
<p>Paragraph text</p>
<a href="https://example.com">Link</a>
The closing tag contains a slash before the name: </p>
📎 Unpaired tags
They have no content and no closing part.
<link rel="stylesheet" href="style.css">
<meta charset="UTF-8">
<img src="photo.jpg" alt="Photo">
Attributes
- Written only in the opening tag.
- Format:
name="value"— no spaces around= - Always double quotes.
- Attributes are separated from one another by a space.
Nesting tags
Tags can be nested inside one another, like boxes. The main rule: the inner tag must be entirely contained within the outer one.
✅ Correct
<body>
<a href="#">Link</a>
</body>
❌ Incorrect
<body>
<a href="#">Link
</body>
</a> <!-- overlap! -->
Minimal HTML page template
Every page on the internet contains the same set of mandatory tags:
<!DOCTYPE html>
<html lang="uk">
<head>
<meta charset="UTF-8">
<title>Page title</title>
<link rel="stylesheet" href="style.css">
</head>
<body>
<!-- The page content goes here -->
</body>
</html>| Tag | Purpose |
|---|---|
<!DOCTYPE html> |
Tells the browser the HTML version (the fifth, modern one) |
<html lang="uk"> |
The root tag. The lang attribute is the page language (for SEO and screen readers) |
<head> |
Meta information: encoding, tab title, linking styles |
<meta charset="UTF-8"> |
The page encoding. Always UTF-8 |
<title> |
The text in the browser tab |
<link> |
Linking a CSS stylesheet file |
<body> |
All the visible content of the page |
index.html — it is the one the browser looks for by default when opening a folder on the server.Browser inspector (DevTools)
The inspector is one of the markup developer’s main tools. It opens with:
- F12 (Windows/Linux) or Fn + F12 (Mac with TouchBar)
- Ctrl + Shift + I / Cmd + Option + I
- Right click → “Inspect”
What you can do in the inspector
- Elements tab — view and interact with the page’s HTML tree.
- Styles tab — view the CSS styles of the selected element. You can temporarily disable or change properties.
- Computed tab — all the actually applied styles, including inherited ones and the browser defaults.
CSS basics
CSS (Cascading Style Sheets) is a language for describing appearance. First we build the skeleton in HTML, then we attach styles in CSS so the page looks the way the layout intends.
CSS syntax
body {
background-color: purple;
font-family: Arial, sans-serif;
color: white;
}- Selector (
body) — specifies which element the styles apply to. - Property (
background-color) — what exactly we are styling. - Value (
purple) — the value we assign. - Each declaration ends with a semicolon
; - The curly brace
{goes on the same line as the selector, after a space. - Each property goes on a new line, indented by 2 spaces.
Main CSS text properties
| Property | What it does | Example values |
|---|---|---|
font-family |
Font name | Arial, Tahoma, sans-serif |
font-size |
Font size | 16px, 50px |
font-weight |
Font weight | normal (400), bold (700), 100–900 |
font-style |
Typeface style | normal, italic, oblique |
color |
Text color | white, #ffffff, #333 |
background-color |
Background color | purple, #800080 |
text-decoration |
Text decoration | none, underline, line-through |
color, not font-color. This is a common stumbling block for beginners.font-family: fallback fonts
Always specify several fonts separated by commas, with a family at the end:
font-family: Arial, Tahoma, sans-serif;- The browser tries the first font. If it doesn’t find it — the second, and so on.
sans-serif— a sans-serif font (Arial, Helvetica).serif— a serif font (Times New Roman, Georgia).monospace— a monospaced font (Courier, Consolas).
Colors in CSS
Colors can be set in several ways:
- Keyword:
white,black,purple - HEX format:
#ff0000— two characters for each component (R, G, B) #ffffff— white (the maximum of all components)#000000— black (the minimum of all)
Cascade and inheritance
CSS stands for Cascading Style Sheets. This means that styles can override one another according to priority rules.
Three sources of styles (from lower to higher priority)
- Inherited styles — an element inherits some properties from its parent (for example, the font from
body). - Built-in browser styles — every tag has default styles from the browser developers (for example, links are blue with an underline).
- Your own styles — always have the highest priority.
<a> link inherits color: white from body. But the browser style overrides it with blue. To make the link white, you need to explicitly set a {
color: white; } — and your style will win.Resetting default styles
Browser styles (spacing, fonts, sizes) often get in the way during markup — they can differ between browsers. That’s why styles are reset before starting work. There are several approaches:
Approach 1: The universal selector *
The simplest way is to reset the spacing for all elements at once:
* {
margin: 0;
padding: 0;
box-sizing: border-box;
}
The * selector (asterisk) is universal and applies to all elements on the page. Adding box-sizing: border-box makes width and height include padding and border (more on this in the lecture about the box model).
This is the minimal option, suitable for learning and small projects. In practice, more thorough solutions are used.
Approach 2: CSS Reset (Eric Meyer)
Reset CSS is a stylesheet that completely zeroes out all browser styles. After the reset is applied, every element looks the same — like plain text with no spacing, borders, or sizes.
/* Fragment of reset.css */
html, body, div, span, h1, h2, h3, h4, h5, h6,
p, a, img, ol, ul, li, form, label, table,
caption, tbody, tfoot, thead, tr, th, td {
margin: 0;
padding: 0;
border: 0;
font-size: 100%;
font: inherit;
vertical-align: baseline;
}
Advantage: full predictability — you start with a blank slate. Drawback: you have to re-declare styles for lists, headings, tables, and so on.
Approach 3: Normalize.css
Normalize.css works differently — it doesn’t reset styles completely, but aligns them across browsers. Useful styles (heading spacing, list markers) are preserved, but become the same in Chrome, Firefox, Safari, and others.
Advantages:
- Preserves useful browser styles instead of destroying everything
- Fixes known bugs and inconsistencies between browsers
- Less work after applying it — basic elements already look fine
Comparison of approaches
- Zeroes out everything
- Headings = plain text
- Lists without markers
- You need to style everything from scratch
- Aligns across browsers
- Headings stay larger
- Lists with markers
- Less manual work
How to include it
Reset or Normalize is included as the first CSS file — before your styles:
<link rel="stylesheet" href="normalize.css">
<link rel="stylesheet" href="style.css">
The order matters: first we reset/align, then we write our own styles on top.
* is enough.Links (the <a> tag)
The <a> tag creates a link. Its required attribute is href, which specifies where the link leads.
<a href="https://example.com">Go to the site</a>- Without
href, the text won’t be clickable and the cursor won’t change to a “hand”. - By default, links are blue with an underline (browser styles).
- To remove the underline:
text-decoration: none;
Link protocols: tel: and mailto:
In the href attribute you can use special protocols for calls and email:
<!-- Call -->
<a href="tel:+380991234567">+38 (099) 123-45-67</a>
<!-- Email -->
<a href="mailto:info@example.com?subject=Request">Write to us</a>
tel: — the protocol for calls
It works well on mobile devices: tapping opens the dialer. On desktop, the behavior depends on the OS and the installed programs.
mailto: — the protocol for email
- The email address is exposed to spam bots
- The user leaves the site (switches to an email client)
- You can’t track effectiveness (UTM tags, analytics)
- Not everyone has an email client set up
A better alternative is a contact form on the site.
Data attributes
HTML5 lets you create arbitrary attributes with the data- prefix:
<div data-category="news"
data-user-id="42">...</div>- Can be added to any tag
- The browser ignores them — they don’t affect rendering
- Used to store additional data for JavaScript
Outputting a data attribute via CSS
<!-- HTML -->
<span data-tooltip="Tooltip">Hover the cursor</span>
/* CSS — outputting the value of a data attribute */
span::before {
content: attr(data-tooltip);
}The attr() function works only in the content property of pseudo-elements.
CSS variables (custom properties)
CSS variables (custom properties) let you store values and use them across the whole page. This is one of the most useful features of modern CSS.
Declaration and use
:root {
--header-height: 50px;
--footer-height: 4rem;
--primary-color: #3498db;
}
.header {
height: var(--header-height);
}
.footer {
height: var(--footer-height);
}
.content {
min-height: calc(100vh - var(--header-height) - var(--footer-height));
}
Syntax
- Declaration: starts with two dashes —
--name: value - Use: the
var(--name)function - The name is case-sensitive:
--Colorand--colorare different variables
Scope
:root— the variables are available everywhere on the page (global)- If declared in a specific selector, the variables are available only inside that element and its descendants
Use with a style guide
The designer’s style guide defines all the colors, font sizes, and spacing. A minimal padding (for example, 10px) means that all spacing is a multiple of that number: 10, 20, 30px. CSS variables are perfect for storing such values:
:root {
--spacing-unit: 10px;
--font-heading: 24px;
--font-body: 16px;
--color-primary: #2c3e50;
--color-accent: #e74c3c;
}$color in SCSS), which exist only at the compilation stage.@supports — checking CSS support
The @supports rule checks whether the browser supports a particular CSS property, and applies styles only if it does.
Syntax
@supports (display: grid) {
.container {
display: grid;
grid-template-columns: repeat(3, 1fr);
}
}
Logical operators
/* OR */
@supports (display: grid) or (display: flex) { ... }
/* AND */
@supports (display: grid) and (gap: 10px) { ... }
/* NOT — use with caution */
@supports not (display: grid) { ... }not: if the browser doesn’t support @supports itself, it will ignore the whole block, including the not variant. That’s why @supports not (...) is an unreliable option for older browsers.Practical use
Use @supports when you want to apply a new CSS property but aren’t sure about support. Write the base styles without @supports, and the enhanced ones inside it:
/* Base version */
.layout {
display: flex;
flex-wrap: wrap;
}
/* Enhanced version for browsers that support grid */
@supports (display: grid) {
.layout {
display: grid;
grid-template-columns: repeat(auto-fit, minmax(250px, 1fr));
gap: 20px;
}
}
Code editors
Free editors that don’t require complex setup:
- Visual Studio Code — the most popular one, with a huge ecosystem of plugins. The industry standard.
- Zed — modern, ultra-fast (written in Rust), free and open source. Built by former Atom developers.
- Sublime Text — lightweight and fast, but paid ($99).
AI editors
A separate category of editors with deep artificial-intelligence integration. AI helps write code, find errors, and suggest solutions right in the editor:
- Cursor — a fork of VS Code with deep AI integration. One of the first AI editors to gain mass popularity. There’s a free tier.
- Windsurf — an AI editor based on VS Code (formerly called Codeium). There’s a free tier with unlimited autocomplete.
- Antigravity — a new AI editor focused on fast development with the help of AI agents.
Professional IDEs
An IDE (Integrated Development Environment) is a full-fledged development environment with a built-in debugger, refactoring, framework support, and other tools:
- WebStorm (JetBrains) — a powerful environment for JavaScript/TypeScript and front-end development.
- PhpStorm (JetBrains) — an environment for PHP development. Includes all the features of WebStorm + support for PHP, databases, and frameworks (Laravel, Symfony, etc.).
All JetBrains IDEs are free for learning and personal projects (non-commercial license since 2024).
Sandboxes (online editors)
A sandbox is a website for quickly writing and previewing HTML/CSS without creating files.
Popular sandboxes
- CodePen — the most popular, convenient for learning HTML/CSS
- JSFiddle — lightweight, no registration required
- CodeSandbox — for more complex projects with npm packages
- StackBlitz — runs entirely in the browser, supports Node.js
How a sandbox differs from an editor
- No minimal template needed — you work directly inside
<body>right away. - The CSS file is automatically linked.
- The result updates instantly without manually refreshing the page.
- A unique link is generated — handy for sharing the result.
About preprocessors and other technologies
The browser works with exactly three technologies: HTML, CSS, and JavaScript. Everything else (SASS, SCSS, LESS, React, TypeScript, etc.) consists of add-ons and tools that speed up development. Preprocessor files cannot be linked to HTML directly — they need to be compiled into ordinary CSS.
Why preprocessors are needed
Plain CSS is powerful, but on large projects it becomes unwieldy. Preprocessors add features that aren’t (or previously weren’t) in standard CSS:
- Variables — store colors, sizes, and fonts in one place
- Nesting — you write selectors inside parent ones, like an HTML structure
- Mixins — reusable blocks of styles that can be called in a single line
- Math — arithmetic operations on values
- Imports — splitting styles into separate files without extra HTTP requests
SASS / SCSS
SASS (Syntactically Awesome Stylesheets) is the most popular CSS preprocessor. It has two syntaxes:
- .sass — the old syntax without curly braces and semicolons (indentation instead of braces)
- .scss — the new syntax, fully compatible with ordinary CSS. Any CSS file is already valid SCSS
An example of SCSS using variables and nesting:
// Variables
$primary-color: #3498db;
$font-main: Arial, sans-serif;
// Nesting
.header {
background: $primary-color;
font-family: $font-main;
.nav {
display: flex;
a {
color: white;
&:hover {
opacity: 0.8;
}
}
}
}
After compilation, this code turns into ordinary CSS:
.header {
background: #3498db;
font-family: Arial, sans-serif;
}
.header .nav {
display: flex;
}
.header .nav a {
color: white;
}
.header .nav a:hover {
opacity: 0.8;
}
LESS
LESS (Leaner Style Sheets) is another preprocessor, similar to SCSS. The main difference is that variables start with @ instead of $:
@primary-color: #3498db;
.button {
background: @primary-color;
}
LESS was popular earlier (Bootstrap 3 used it), but now most projects have moved to SCSS.
PostCSS
PostCSS is not a preprocessor in the classic sense, but a tool for transforming CSS with the help of plugins. The best-known plugins:
- Autoprefixer — automatically adds vendor prefixes (
-webkit-,-moz-) for support of older browsers - cssnano — minifies CSS for production
PostCSS is often used together with SCSS: first SCSS compiles into CSS, and then PostCSS adds prefixes and minifies.
How compilation works
A .scss or .less file is compiled into ordinary .css using special tools. The HTML links the already compiled CSS:
<!-- In HTML we link only CSS, never SCSS -->
<link rel="stylesheet" href="style.css">
Compilation happens automatically during development — when you save a .scss file, the tool generates an updated .css.
Modern CSS is catching up with preprocessors
Many of the features preprocessors used to be chosen for are now in standard CSS:
| Feature | Preprocessor | Native CSS |
|---|---|---|
| Variables | $color: red (SCSS) |
--color: red (CSS Custom Properties) |
| Nesting | Supported for a long time | CSS Nesting — supported since 2023 |
| Math | $width / 2 |
calc(100% / 2) |
--color) work at runtime — their values can be changed via JavaScript or media queries. Preprocessor variables ($color) exist only at the compilation stage and disappear in the final CSS. These are different tools for different tasks.Tips for beginners
- Learn English — all of markup is based on the English language. The more fluently you command it, the easier things will be.
- Be attentive — every missed period or quotation mark can break the page.
- Don’t stop at markup — a pure markup developer without JavaScript is in little demand these days. Learn JS, frameworks, and become a front-end developer.
- Gain experience — after courses you need practice. Build markup for yourself, for friends, take small freelance projects.
- Google properly — the point is not to copy a ready-made solution, but to understand why it works the way it does.